Rock star tundra
It started all the way back in April 2009, when Chris sent us an email asking if we had any info on 2010 Tundra pricing. As time went by, we got more emails from Chris, keeping us up-to-date on his search for the perfect truck, his plans for accessories, and some much-appreciated comments on the site.
Over the last year, Chris’s dream of building the ultimate truck – a “rock star” – has taken form. Over the next few weeks, I’ll be reviewing the build-out of Chris’s brand new 2010 Tundra. Today’s post talks about the purchase process and introduces the truck, and future posts will discuss options and accessories, show you pictures along the way, and hopefully entertain. Here we go: Buying A Tundra Shouldn’t Be So Hard
Chris writes:
“I have invited 14 dealerships to bid on a fully loaded (and then some) Tundra according to a list I compiled in the bid request itself, wherein dealerships can’t play their deceptive games and I’ll actually get the best possible price. I’ve canvassed no less than 12 Toyota dealerships in 3 states for the following special order: A CrewMax Limited 4×4 5.7 with DVD Nav, Power Memory Package, and sunroof.”
Chris’s search was extensive – he wanted to find the best deal possible. After narrowing his search down to a Tundra at a local Colorado dealership, Chris hit his first snag: In Colorado, the only 5.7 4×4 Limited Tundras available have flex-fuel engines. This means that Chris couldn’t add a TRD supercharger to a Colorado truck because they’re incompatible with flex-fuel motors.
Obviously, this is unacceptable. (Spoiler alert – this Tundra is getting a blower!)
SO, the process of finding the right truck for the right price began again. After more time and trouble – including working with a Denver area Toyota dealer to locate an out-of-state vehicle – Chris found the Tundra he was looking for 1,050 miles away in California.
EDIT – Chris *did* find a truck in California like we wrote above. HOWEVER, the dealership in California expected Chris to pay sales tax in CA despite the fact Chris lived out of state. Obviously, that didn’t work. The truck below is actually from Arizona…so that makes 3 snags in the purchase process.
Just as Chris was ready to buy his truck, he hit his 2nd snag: Toyota froze sales of the Tundra nationwide to fix sticky pedals hours before completing his purchase. In his own words:
“Now I’m within days of buying the right truck and they freeze their sales nationwide? What a bunch of sh*t this is.”
He went on to ask why Toyota froze sales because of a silly little shim (OK – he didn’t use those words precisely, but you get the idea). Finding The Golden Truck
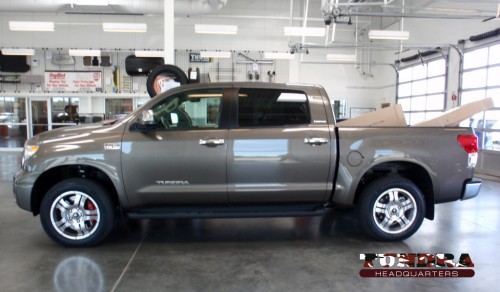
After overcoming geography, Toyota dealers who didn’t want to deal with a special order (read aboutwhy Toyota dealers don’t like special orders), and some confusing pricing and product info from Toyota (Colorado Toyota dealers didn’t know for sure if they could order a non-flex-fuel 4×4, and neither did their reps at Toyota) Chris zeroed in on this truck:
This is how the Rock Star Tundra project begins - a brand new pickup on a California Toyota dealership lot.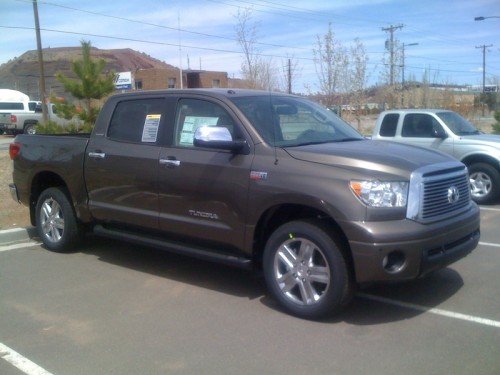
Chris's Tundra with brakes, wheels, tires, suspension, and performance mods - get the full story below
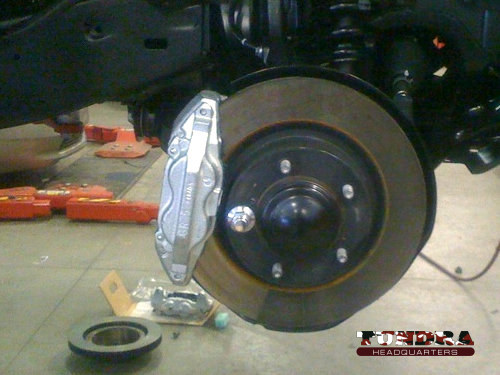
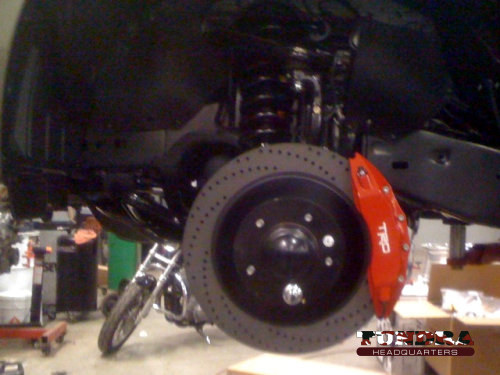
Now that Chris had finally found the right truck, it was time focus on making the stock 5.7 Tundra Crew a better performer. First up – better brakes.TRD’s big brake kit is everything you could ask for – bigger, cross-drilled rotors with a patented AeroRotor internal vane cooling design. Better brake rotor cooling means that brakes are more resistant to fade, a concern when towing in Colorado’s mountain passes – which Chris is definitely going to do. The big brake kit also includes 6 piston calipers and stainless steel lines, both of which perform better than the factory brake system.
The stock brake setup on a new 2010 Tundra
The cross-drilled rotors and six piston calipers from TRD's Tundra big brake kit
It’s a little-known secret that TRD sources their big brake kits from manufacturer StopTech – you canread all about StopTech’s big brake kits on their website.Next, it was time to make some suspension enhancements – specifically, a sway bar from TRD and a leveling kit from ToyTec.
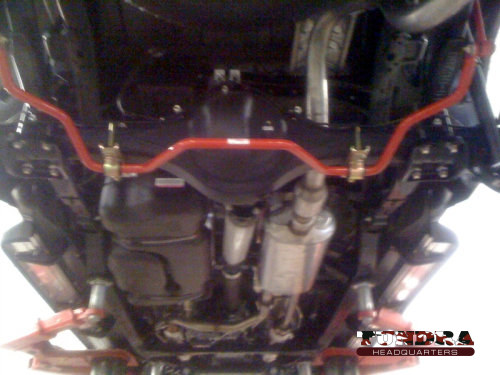
TRD's Tundra sway bar reduces body roll in the corners.
TRD’s rear sway bar helps with to reduce body roll during cornering , and the ToyTec leveling kit makes the truck a little more balanced.With better brakes and handling, the truck is now ready for a TRD supercharger. Remember, Chris had to work hard to find a 2010 Tundra without the flex-fuel option. If he hadn’t found a regular 5.7, the supercharger wouldn’t have been compatible.
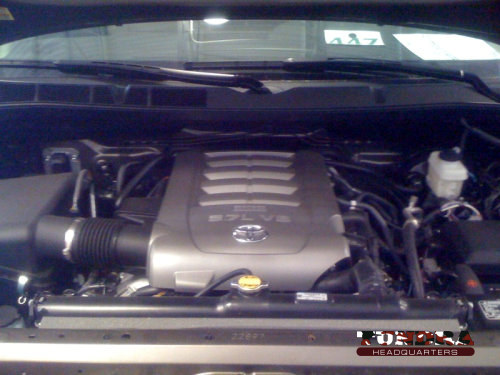
This is what most 2010 5.7L Tundras look like under the hood.
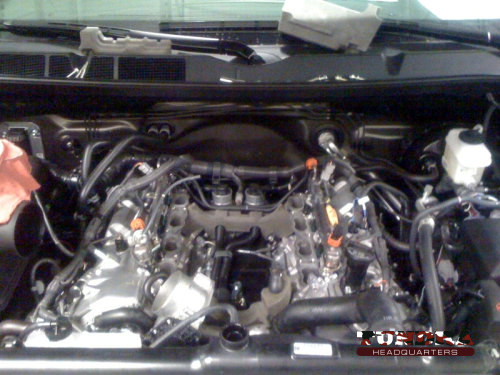
Almost ready
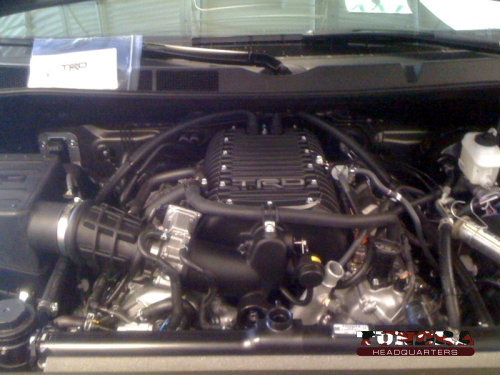
504 HP and 550 lb-feet of torque in just a few hours later
In addition to the unit itself, the supercharger kit also includes an air intake, an intercooler, new plugs, and bigger injectors. When it’s all said and done, the TRD supercharger adds more than 120 hp and 150 lb-ft of torque to the already powerful 5.7. Because Chris had this kit installed by a Toyota dealership, it’s covered by the standard 5 year, 60k mile powertrain warranty.According to Chris, the TRD supercharger is “the only way to fly.”
Chris would like to thank Ian Brooks, Mimi Solorzano, and Robert Curley at Findlay Toyota in Flagstaff, Arizona, for installing all these parts. Chris says that mechanic Bob Curley deserves special thanks:
Update: Chris wanted me to mention a few more notes about his salesperson Ian:went out of his way to make sure his installations were top notch and done without damaging the parts I purchased from TRD Sparks…he also took the time to provide me with ‘before & after’ pictures. On top of all this, Bob let me know that someone had filled up the truck with 87 octane gas and that’s a big no-no with Superchargers. The 87 octane was drained out of the tank and refilled with 91 octane the day I came to pick up the truck for the trip back to Colorado Springs. I think he deserves a serious ‘Atta-boy’ above what I personally offered him. Heck, all 3 of them do and the dealership for setting the environment that allowed them to do it.
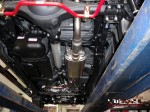
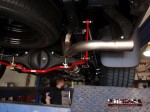
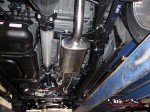
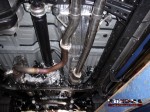
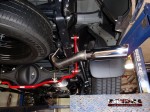
After driving his truck home from Flagstaff, Chris had a Magnaflow cat-back exhaust systeminstalled.Ian worked with me for months checking on prices, researched and made countless phone calls to make sure certain options and accessories were possible as well as available (you know Toyota doesn’t make it easy), found the truck and coordinated the swap with the California dealership the truck was *supposed* to go to, and he constantly checked on the progress of the work being performed. The man worked his tail off over an extended period of time and he deserves recognition.
Shots of the stock 2010 Tundra exhaust system – click each picture for a larger view.
A cat-back Magnaflow exhaust system on this 2010 Tundra
Now his Tundra is significantly faster, stops and handles better, and sounds pretty mean. The next step? It’s time to get serious about accessories…
After a brief hiatus, it’s back to work telling the story about Chris’s rock star Tundra Crew. This week: a little chrome, and a whole lot of stereo equipment.
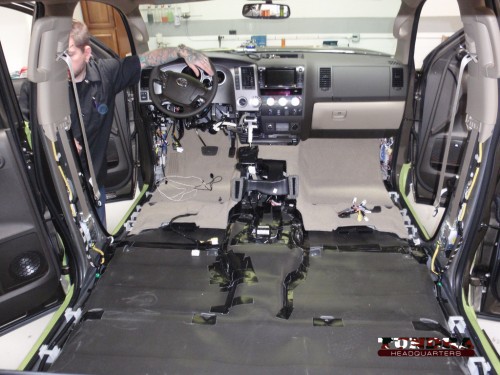
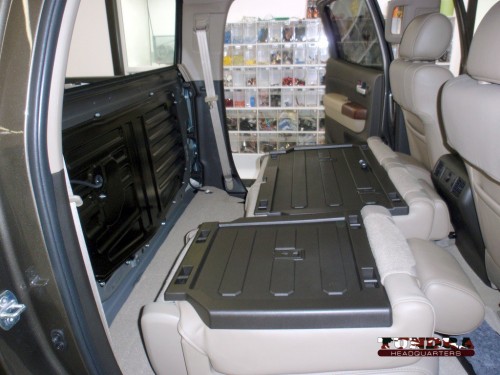
Yep - it's a Tundra crew without seats. Neat, huh?
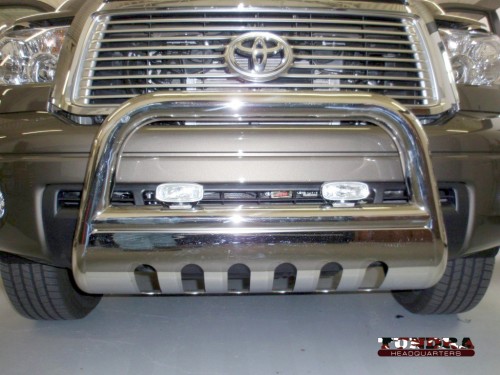
Follow along as we break down a comprehensive high-end sound system installation in a 2010 Tundra crew that puts the “rock” in Rock Star.First, let’s get a couple of “details” out of the way. Chris’s ride has a touch of chrome – a Steelcraft bull bar up front and some 5″ Raptor oval stainless steel sidesteps.
That's a set of PIAA 2100 HID driving lights on a Steelcraft chrome bull bar
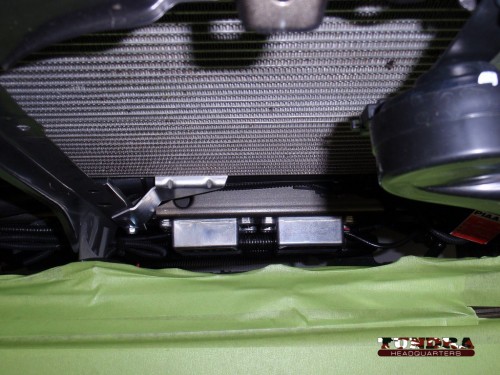
You’ll note that there are a set of HID driving lights mounted on this bull bar. The ballasts for these lights were installed just behind the grill, just below the radiator. This helps to ensure they stay cool without effecting the supercharger’s intercooler, transmission cooler, or radiator.
HID ballasts are mounted low and out of the way, but still able to cool themselves.
While Chris is perfectly content with the Steelcraft bull bar, the Raptor side steps are a little disappointing in one area. Rather than using all of the Tundra’s factory-drilled side step mounting points, the Raptor steps only utilize 3 or the 4 sets of pre-drilled holes. Even worse, the side step brackets don’t allow for two bolts…just one.
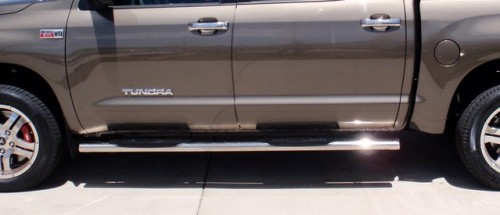
The Raptor 5" steel steps have solid steel end caps, but a less-than-perfect mounting system
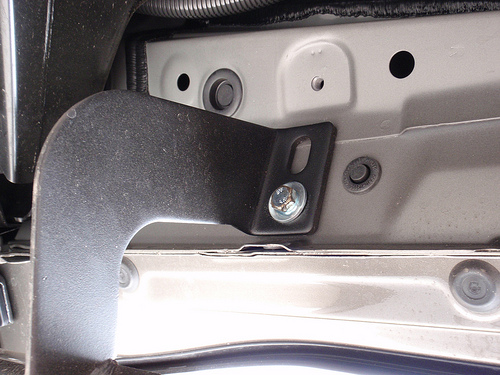
You can see how the bracket can't possibly take advantage of both of the Tundra's pre-drilled mounting points.
Chris says that the quality of the step is top-notch, and unlike most of their competitors, they actually weld a piece of solid steel onto each end of the bar. This is arguably superior to using a plastic cap that might allow moisture to enter the tube and eventually cause rust. Chris also likes the size of the – the step surface is quite good. His quote – “why go 99% of the way and fumble the ball?” with a half-done set of mounting brackets. Custom High-End Stereo ExplosionThe vast majority of factory or “stock” stereo systems are handicapped by a combination of low power, middle of the road quality, and a fairly loud “box” to play in. This isn’t to say that a standard stereo is bad…it’s just not nearly as good as a mid-range home stereo. If you’ve become accustomed to pristine sound quality (and Chris has), then you might want to check out all the mods that have been made to this Tundra.
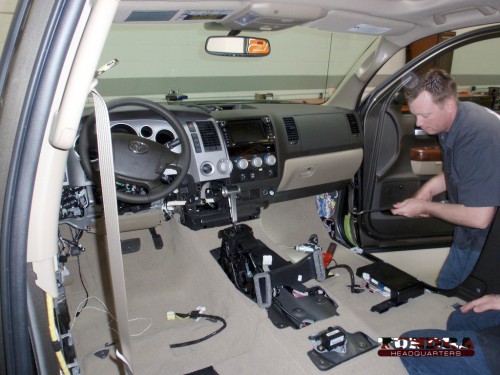
First off, it’s important to remember that a stereo is only as good as the room it’s placed in. A vehicle, for example, has a lot of sound “leaking” in from the engine, exhaust, tires, and suspension. This so-called “road noise” can mask the fidelity of a truly excellent sound system, so step one in any high-end stereo install is to place some serious sound deadening material in the floor, doors, and roof.
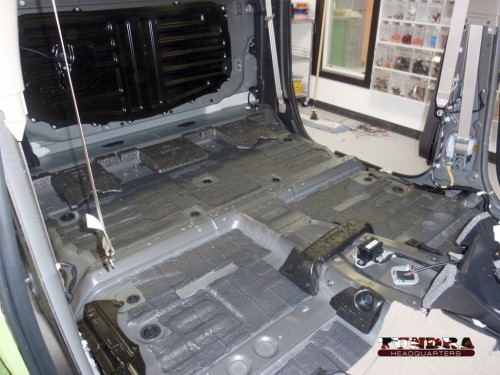
With the seats and carpet removed, this is what a 2010 Tundra crew looks like. Note the light-grey factory sound-deadening material.
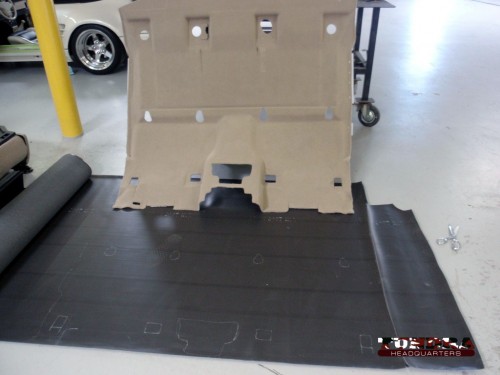
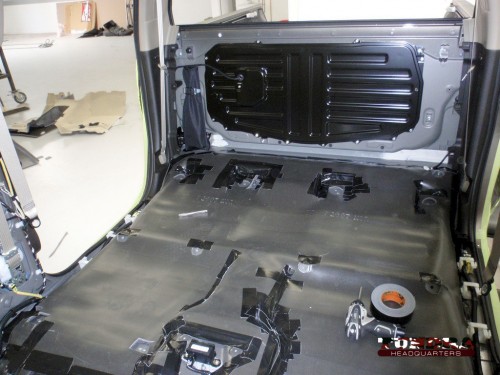
The carpet, once removed, is used to make a template for the sound deadening material
As you can see, the new sound deadening material is thicker and coverage is more complete than the factory-installed material.
Another view of the new sound deadening material under the factory carpet.
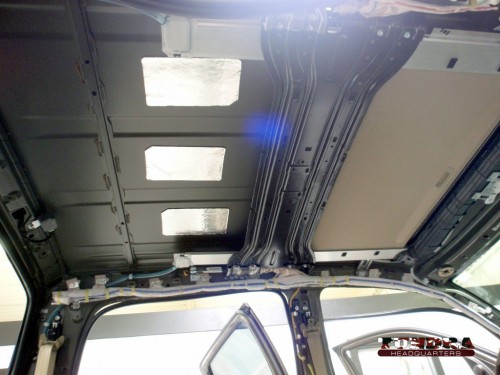
With the headliner removed, you can see the silver "panels" of sound deadening installed by Toyota. Obviously, that's not enough material for this truck.
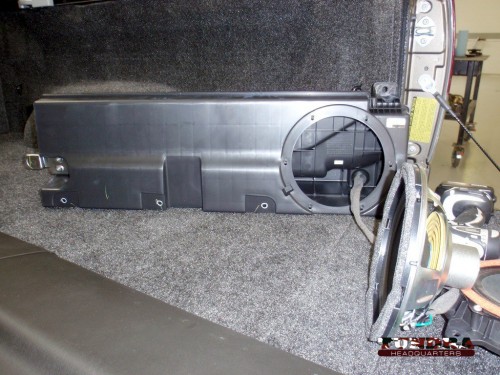
Sound deadening materials also help to eliminate vibrations, which is a good thing when you install a powerful subwoofer in a custom enclosure. Here’s the before and after of this Tundra’s rear-mounted sub:
Here's the rear of the truck with the sub-woofer and enclosure removed.
Here's the stock Tundra subwoofer taken out of the factory enclosure. Chris says "I've seen bigger magnets holding school papers on a refrigerator!"
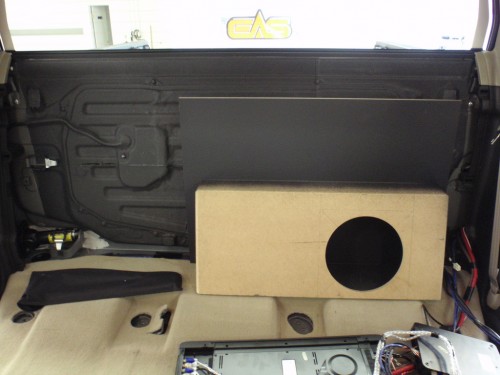
This custom subwoofer enclosure allows for a bigger sub, an Audison amp, and it's sprayed with a special sound-deadening paint too.
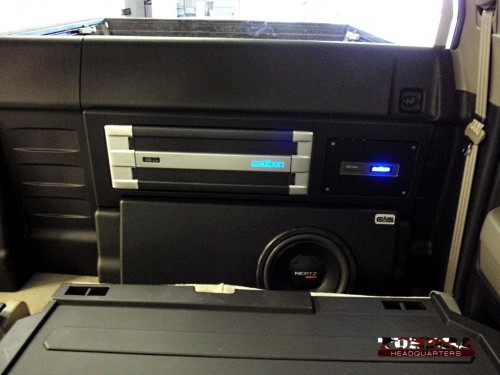
The finished product - a powerful sub and amp that look factory (only nicer).
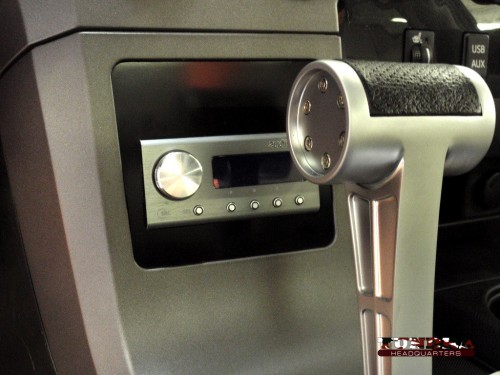
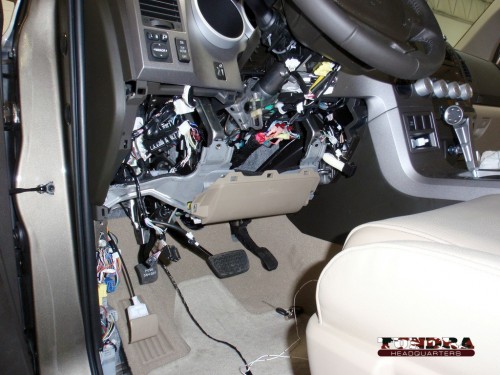
With the subwoofer installed (along with new speakers in the front doors) and this 1500+ Watt Audison amp, it’s time to tie everything together. Like many new vehicle buyers, Chris wanted to invest in a high quality after-market stereo, but he didn’t want to throw away a very nicely integrated factory navigation unit. The trouble is, most factory head units simply can’t provide the wattage or number of outputs needed to power a quality after-market sound system.The solution? Use a digital signal processor (DSP) to interface the factory stereo with the after-market system. Chris’s truck uses the Audison Bit One Processor, and incredible little piece of technology that allows for a tremendous range of sound tuning. This DSP is programmable via personal computer (you can read an interesting review of it here) and it has the ability to very specifically direct frequencies to each speaker, eliminate sound clipping at even the highest volumes, and then of course do everything any equalizer or digital audio unit can accomplish. In short, it is the brain of the system…and it gets a very nice install in the dash, just in front of the shifter.
The Audison DSP looks factory, doesn't it? (Only better)
What does it all add up to? Arguably one of the best sound systems ever installed in a new truck. Chris said that “now I’ll hear what Stevie Ray Vaughn is supposed to sound like.”Sounds good (pun intended).
Finally, Chris would like to give his thanks to the company that installed this system. EAS - Elite Audio Solutions of Colorado Springs, Colorado – did a tremendous job fawning over the details of this truck. Not only did they carefully install a lot of stereo equipment, they also added a Clifford 590.2X alarm system, and they installed the HID headlights on the bull bar.
Installing the Clifford 590.2X alarm system. Includes a 1-mile transmitter, remote start, and self destruct button.
EAS was so incredibly concerned about details that they taped up the bull bar while installing the lights just so they could avoid scratching the chrome. THAT is the kind of work you want from your after-market installers. EAS has also invited Chris to come back for a “re-tuning” of his system as part of his purchase. If you live in Colorado – or you don’t mind making the drive – it definitely sounds like EAS is worth the trip.Click to see some larger photos of the EAS shop and fabrication area.
In the final post on this Rock Star Tundra, we’ll recap all the mods and show off the finished truck. Stay tuned!


Recommended Comments
Join the conversation
You can post now and register later. If you have an account, sign in now to post with your account.